Today I wanted to bring to you this very simple yet pretty country wreath I made for Spring to hang on my front door.
The supplies you’ll need.
A Grapevine wreath
Two kinds of ribbon in varying sizes
Nice artificial flowers.
Wire Snippers
Tape, Straight Pins or Glue

I chose to use a grapevine wreath because with this type you don’t need to use any hot glue or anything to attach your pieces, unless you want to of course. With this kind of wreath you can simply tuck in your ends and they will stay. The other added plus is because you haven’t had to permanently attach anything to the wreath you can swap it out all year long if you chose with different ornaments on it.
I also did not use burlap on this project because while I know burlap is a very hot item in the crafting world, my skin does not seem to like burlap. It makes me very itchy so I went with a ribbon that sort of looks like burlap. For the my second ribbon I chose a very pale pink.

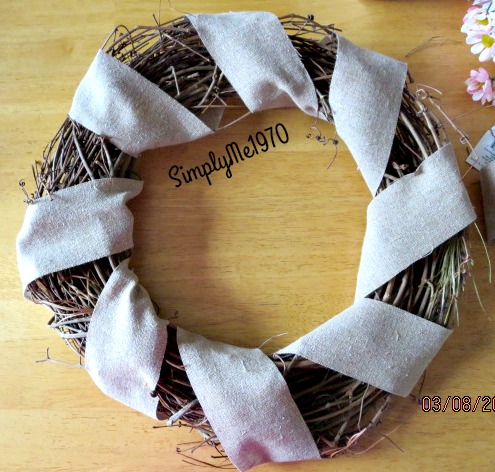
To begin all you need to do is to start wrapping your ribbon around your wreath form tucking in the first end of your ribbon on the back of the grapevine wreath then you continue all the way around the wreath until you reach the end where you will then tuck your ending piece in as well. The ribbon should be secure but not wrapped so tightly that it distorts the ribbon or the wreath. When finished it should look like this.
Next you want to begin wrapping your second ribbon choice around your original ribbon. This can get tricky but with a little patience it will work. Also, since I did not want to use any kind of hot glue to adhere permanently I took a small piece of shipping tape and taped the beginning end of my second ribbon to the back of my original ribbon so it would stay in place. And I did the same thing for the ending piece of the second ribbon as well. Here’s a photo to show you what I did. May not be pretty but it worked.

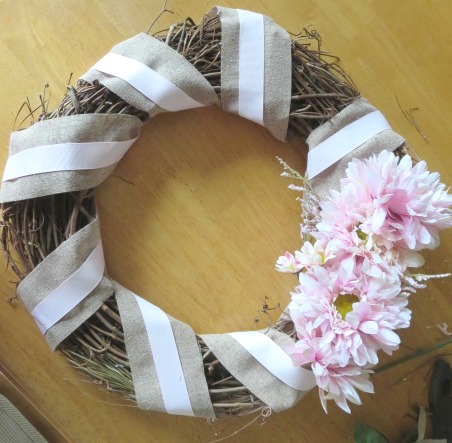
Once you’ve completed your second ribbon your wreath should look something like this.

Next step is adding the flowers. I took some wire snips and cut them off the bunch they were in but leaving enough stem in order to stick them into my grapevine wreath. You can arrange yours any way you choose. I chose to do mine more to the side than the center. Carefully placing your flowers in the wreath being sure not to disturb your ribbon too much. When completed it should look something like this.
I hope you enjoyed this DIY and if you decide to make one please let me know about and post a photo of your completed wreath to my Facebook page. I would love to see it!